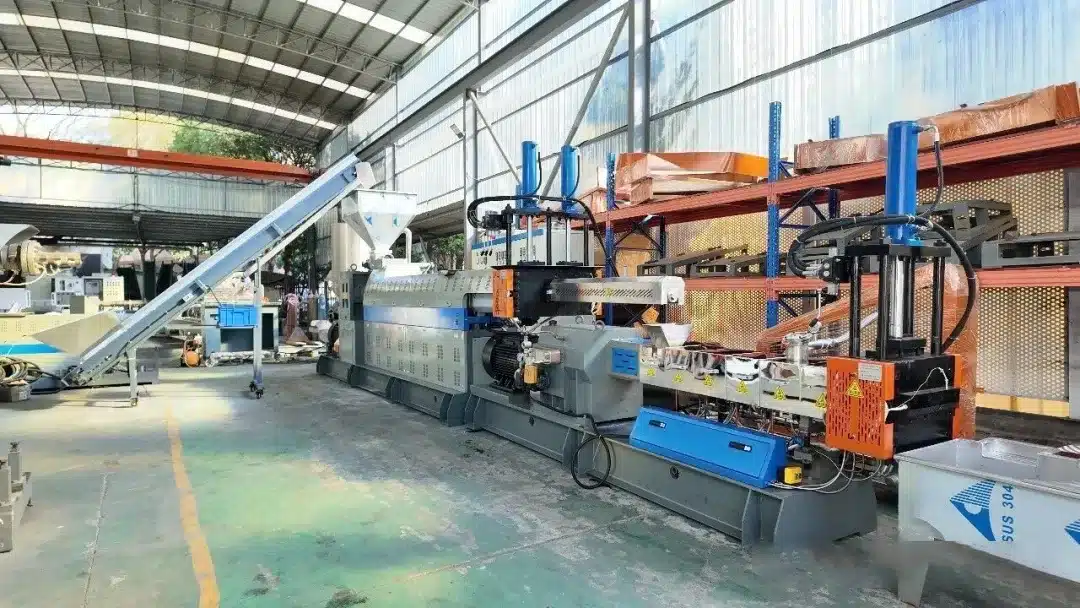
How to Start a New Twin-Screw Plastic Pelletizing Machine
Starting a new twin-screw plastic pelletizing machine requires more than simply switching on the power. Before the first production run, operators should inspect the feeding system, screws, gearbox, vacuum system, electrical components, cooling system, and pelletizing equipment. Correct temperature settings, controlled feeding, and sufficient heating time are also essential for stable operation and consistent pellet quality.
For plastic recycling plants, a proper startup procedure helps reduce the risk of screw damage, material blockages, overheating, excessive motor load, and poor pellet formation. This guide explains how to prepare a new plastic pelletizing machine before its first production run, covering pre-start inspections, process parameter settings, barrel heating, trial operation, and common safety precautions.
Important: Startup procedures and operating parameters vary by machine design, screw configuration, plastic material, and production requirements. Always follow the equipment manufacturer’s operating manual and commissioning instructions.
Pre-Startup Inspection: Check Every Major System
Before starting a new twin-screw plastic pelletizing line, inspect all major components to confirm that the equipment is correctly installed and ready for commissioning.
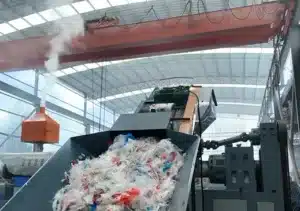
Check the Feeding System
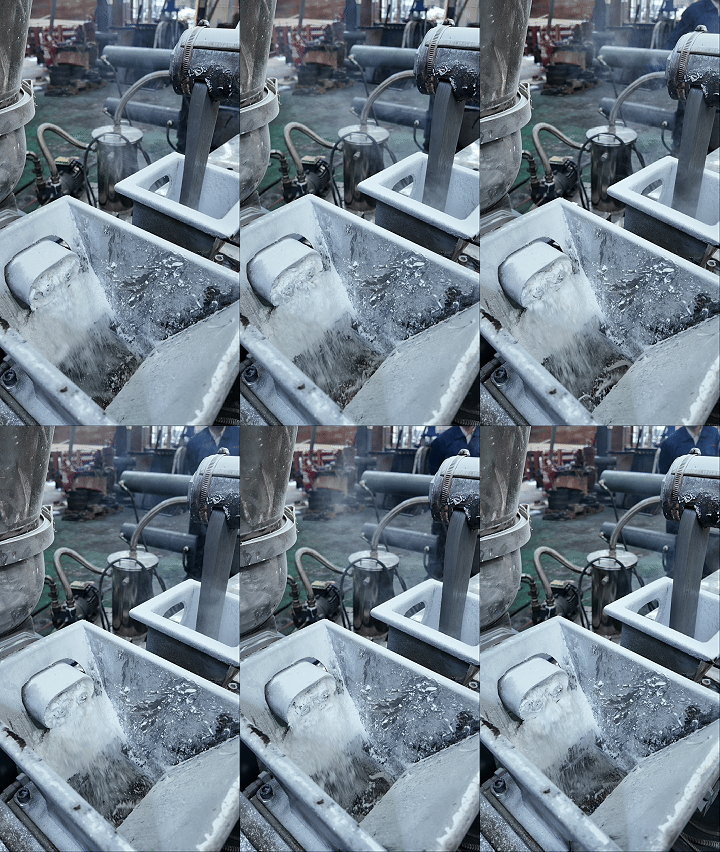
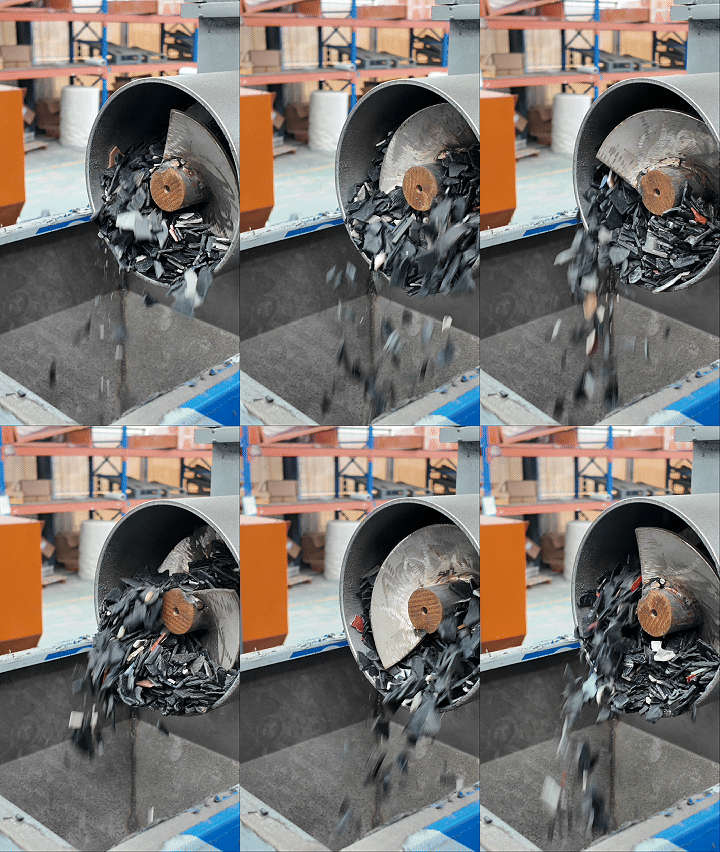
The feeding system controls how plastic material enters the extruder. Improper feeding can cause blockages, unstable output, and excessive motor load.
Before startup:
Check the feeder, hopper, and feeding channel for foreign objects, hardened plastic, and accumulated debris.
Confirm that the feeding screw rotates in the direction specified by the manufacturer. Do not assume that clockwise rotation is correct for every machine.
Check that the feeder is securely installed and that all protective covers are in place.
Verify that the feeding motor and speed-control system operate correctly.
Make sure the raw material is suitable for the selected process, including its size, moisture content, and contamination level.
For PE film, PP woven bags, and other lightweight recycled plastics, stable feeding is particularly important because loose materials may bridge inside the hopper or feed unevenly.
Inspect the Vacuum Degassing System
Many plastic recycling pelletizing lines use a vacuum degassing system to remove moisture, air, and volatile substances from molten plastic. This is especially useful when processing printed PE film, recycled PP woven bags, or materials containing residual moisture and volatile contaminants.
Before startup:
Inspect the vacuum port, sealing rings, and connecting pipes.
Confirm that the seals are correctly installed and show no visible damage, deformation, or signs of deterioration.
Check that the vacuum pump, valves, filters, and condensate collection system are properly connected.
Inspect the vacuum pipeline for loose connections or potential air leaks.
Verify that the vacuum gauge and control instruments function correctly.
Where the process requires vacuum degassing, test the system according to the manufacturer’s commissioning procedure. A vacuum level of approximately −0.08 MPa may be used as a reference under certain operating conditions, but it is not a universal acceptance criterion. The required vacuum depends on the system design, local atmospheric pressure, material characteristics, and process requirements.
A leaking vacuum system can reduce degassing efficiency, contribute to unstable extrusion, and affect the appearance and quality of recycled plastic pellets.
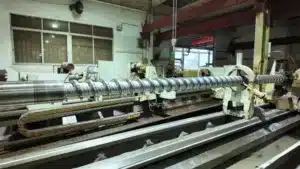
Check the Screws, Gearbox, and Drive System
The screw and drive system are critical components of a plastic extrusion pelletizing machine. Incorrect startup procedures can cause serious mechanical damage, particularly if the screws are not adequately heated or the equipment contains residual solidified plastic.
Before inspection:
Isolate the machine from its power source and follow the required lockout/tagout procedure.
Never put your hands near screws, couplings, belts, or other moving parts.
Check the main extruder, twin-screw unit, couplings, and drive components for correct installation.
Inspect the gearbox lubrication level and confirm that the specified lubricant is being used.
Check the gearbox, motor, and bearing areas for visible damage or loose fasteners.
Confirm that the cooling and lubrication systems required by the gearbox are operational.
If manual shaft rotation is explicitly permitted by the manufacturer’s instructions, perform the check only after the equipment has been safely isolated and the required guards or access procedures have been followed. Do not force the screws to rotate if resistance or binding is encountered.
For a newly installed machine, the first startup should follow the manufacturer’s commissioning procedure rather than relying on manual rotation alone.
Inspect the Electrical and Auxiliary Systems
Electrical and auxiliary systems must be ready before the heating or drive systems are activated.
Check the following:
Electrical connections, grounding, and protective devices.
Motor wiring and the specified power supply voltage and frequency.
Temperature sensors, heating elements, and temperature controllers.
Emergency-stop buttons and safety interlocks.
Cooling-water supply, circulation, and drainage.
Pelletizer blades, blade clearance, and secure installation.
Water-ring or strand-pelletizing components, depending on the machine configuration.
Conveyor belts, collection bins, and downstream handling equipment.
Do not operate a pelletizer with damaged blades, loose components, or missing safety guards.
If the line uses water-ring pelletizing, verify that the water circulation system is ready before cutting begins. If it uses strand pelletizing, check the cooling bath, strand guide, and drying system instead.
Set the Initial Processing Parameters
Once the mechanical, electrical, and auxiliary systems have been inspected, configure the initial process parameters according to the material and equipment specifications.
There is no single temperature or speed setting suitable for every twin-screw plastic pelletizing machine. Recycled PE film, PP woven bags, HDPE scrap, and mixed plastic materials may require different processing conditions.
Set the Temperature Zones
Most extrusion systems use multiple heating zones to control material melting, mixing, conveying, and extrusion.
A typical temperature-setting procedure is as follows:
Identify each barrel heating zone and the die or downstream heating zones.
Obtain the recommended temperature profile from the equipment manufacturer or process engineer.
Enter the initial setpoints for each zone.
Confirm that all temperature sensors display plausible readings.
Check that the heating zones respond correctly to the temperature controllers.
Do not automatically set every twin-screw barrel zone to 100–160°C. The correct temperature depends on the polymer, additives, contamination, screw configuration, and process design. The actual extrusion temperature may also differ from the polymer’s melting temperature.
For example, PE and PP generally require different processing conditions. Within each polymer family, recycled material composition and degradation history can further affect the suitable operating window.
The temperature of a downstream single-screw extruder, if the line includes one, should also be set according to its specific function and the manufacturer’s recommendations. It should not automatically be set a fixed percentage higher than the twin-screw extruder.
Practical tip: Record the initial temperature profile during commissioning. This creates a useful baseline for troubleshooting and future production runs.
Set the Feeding and Screw Speeds
Feeding speed, screw speed, and pelletizer speed must work together to maintain stable production.
Before introducing material:
Set the feeder to the manufacturer’s recommended low initial speed.
Confirm that the main drive and screw-speed controls respond correctly.
Verify the permitted operating-speed range for each extruder.
Check the pelletizer’s speed-control function.
Confirm that the control system can monitor motor current, torque, and relevant alarms.
A low initial feeding rate is generally preferable during commissioning because it allows operators to observe material flow and machine response before increasing throughput.
However, do not assume that the main extruder must always run slower than the twin-screw unit. In a system containing multiple extrusion stages, the correct speed relationship depends on the equipment arrangement and the role of each stage.
Likewise, the pelletizer speed should be adjusted according to the extrusion output, die design, cutting method, and required pellet size.
Confirm the Process Requirements for the Raw Material
Before startup, confirm that the selected material matches the intended production process.
| Raw material | Key considerations |
|---|---|
| PE film | Moisture, printing ink, residual dirt, feeding stability, and film bridging |
| PP woven bags | Fiber contamination, sand, moisture, and feeding consistency |
| HDPE scrap | Material size, contamination, melting behavior, and screen requirements |
| Mixed PE/PP material | Polymer compatibility, final pellet specifications, and customer requirements |
| Printed or moisture-bearing recycled film | Vacuum degassing efficiency, volatile content, and material preparation |
If the raw material contains excessive moisture, dirt, metal, or incompatible polymers, adjusting the extruder temperature alone will not solve the problem. Material preparation and appropriate filtration or washing may also be necessary.
Preheat the Extruder and Allow Sufficient Soaking Time
Preheating is a critical step before the first production run. Starting the screws while the barrel or residual plastic is too cold can increase torque and create a risk of mechanical damage.
Activate the Heating System
After confirming that the machine is correctly installed and the electrical system is safe:
Switch on the power supply according to the commissioning procedure.
Activate the heating system.
Allow each zone to heat toward its assigned setpoint.
Monitor the actual temperature displayed by each controller.
Check for abnormal temperature fluctuations, sensor errors, or heating-zone failures.
If a zone does not reach its setpoint or the displayed temperature is clearly abnormal, investigate the cause before proceeding.
Allow the Barrel to Stabilize
When all relevant zones reach their setpoints, allow sufficient soaking time for heat to distribute through the barrel and other components.
A holding period of approximately 30–45 minutes may be suitable for some machines, while larger equipment or particular material and screw configurations may require longer. Some systems require a different period specified by the manufacturer.
Therefore, do not treat 30–45 minutes—or any other fixed duration—as a universal rule. Follow the machine-specific instructions and confirm that the barrel has reached the required thermal condition before starting the screws.
This step helps reduce temperature differences between the barrel surface and internal components. It also helps ensure that residual plastic has softened sufficiently for safe startup.
Never force a cold or mechanically resistant screw to rotate. If the drive cannot start normally, stop and follow the manufacturer’s troubleshooting procedure.
Check the System Again Before Running the Screws
After the heating and soaking stage, verify that:
All required temperature zones are stable.
The gearbox lubrication system is ready.
Cooling and vacuum systems are available where required.
The feeding system is clear and ready.
The pelletizer and downstream equipment are prepared.
Emergency stops and safety interlocks function correctly.
No abnormal odor, smoke, leakage, or visible damage is present.
Only proceed when the equipment is ready and the manufacturer’s startup conditions have been met.
Start the Machine and Conduct a Controlled Trial Run
Once the pre-start checks and heating procedure are complete, begin the trial run according to the manufacturer’s specified startup sequence.
Start the Equipment in the Prescribed Sequence
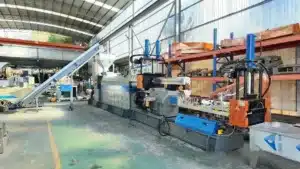
A plastic pelletizing line may include a feeder, twin-screw extruder, single-screw extruder, screen changer, die, pelletizer, cooling system, vacuum system, and conveying equipment.
The correct startup sequence varies by configuration. Do not apply a generic sequence to every line.
During commissioning:
Follow the sequence provided in the operating manual.
Confirm that the relevant auxiliary systems are running before they are needed by the process.
Start the screw drives only when the required temperature and safety conditions are satisfied.
Check motor current, torque, speed, and operating status.
Confirm that each stage responds correctly to the control system.
If the machine is specifically approved for an unloaded trial run, follow the prescribed duration and speed limits. Do not assume that every extrusion system should be run empty for one or two minutes; some screw designs and configurations have different requirements.
Introduce Material Gradually
After the equipment has passed the required initial checks, begin feeding a small, controlled quantity of suitable material.
Observe the following:
Whether material enters the extruder smoothly.
Whether the motor current remains within the expected range.
Whether extrusion pressure and output are stable.
Whether the melt flows consistently through the die.
Whether the pelletizer cuts the material correctly.
Whether vacuum degassing operates as intended.
Whether pellets show signs of bubbles, discoloration, excessive fines, or irregular shapes.
Increase the feeding rate gradually as the process stabilizes. Avoid increasing throughput too quickly, particularly when processing lightweight film or materials with variable composition.
Adjust the Pelletizing Process
The adjustment method depends on whether the line uses water-ring, strand, or another pelletizing configuration.
For water-ring pelletizing, check the cutting system, die-face condition, water circulation, and pellet discharge. For strand pelletizing, monitor strand formation, cooling, and cutting stability.
If the pellets are too long, too short, irregular, or prone to sticking, investigate the relationship between extrusion output, cutting speed, die condition, and cooling performance rather than changing only one setting without diagnosis.
Once stable production is achieved, document the operating parameters and resulting pellet quality for future reference.
Common Startup Problems and What to Check
The following table provides a starting point for troubleshooting. Always stop the machine and follow the approved safety procedure when a fault creates a risk to people or equipment.
| Problem | Possible causes | Recommended action |
|---|---|---|
| Feeder blockage | Foreign objects, material bridging, oversized pieces, or unsuitable feeding conditions | Stop and isolate the equipment before clearing the blockage; inspect material preparation and feeding settings |
| Screw drive cannot start | Insufficient heating, solidified plastic, mechanical binding, or drive-system fault | Do not force the drive; verify temperatures and follow the manufacturer’s troubleshooting procedure |
| Vacuum level is insufficient | Leaking seals, loose pipes, blocked filters, or vacuum-pump problems | Inspect the vacuum circuit and verify the pump and gauge |
| Unstable extrusion output | Inconsistent feeding, unsuitable process settings, contamination, or fluctuating melt conditions | Check feeding consistency, material quality, temperatures, and drive data |
| Poor pellet shape | Incorrect cutting conditions, unstable extrusion, die problems, or inadequate cooling | Check the pelletizer, die, output stability, and cooling conditions |
| Excessive motor current | Overfeeding, excessive resistance, unsuitable temperatures, or mechanical problems | Stop or reduce operation according to the approved procedure; identify the cause before restarting |
| Unusual noise or vibration | Loose components, bearing or gearbox problems, misalignment, or foreign objects | Stop the equipment safely and inspect the source before further operation |
Important Safety Warning
If you observe abnormal mechanical noise, smoke, a burning smell, a sudden rise in motor current, severe vibration, or an unexpected temperature alarm, stop the operation using the approved shutdown or emergency-stop procedure as appropriate.
Do not continue feeding material in an attempt to clear a mechanical fault. Isolate the equipment before inspection, and never remove guards or reach into moving machinery.
Pre-Startup Checklist for a New Plastic Pelletizing Machine
Use this checklist during installation and commissioning. Items marked as applicable should be checked according to the actual machine configuration.
The machine is installed correctly, and the foundation and fasteners have been checked.
The electrical supply, grounding, protective devices, and wiring have been inspected.
Emergency stops and safety interlocks have been tested.
The hopper and feeding channel are clean and unobstructed.
The feeding direction and speed controls have been verified.
The gearbox lubricant is at the specified level and meets the required specification.
Screws and drive components have been checked according to the manufacturer’s procedure.
Heating elements, temperature sensors, and controllers are functioning correctly.
The specified temperature profile has been entered.
The required preheating and soaking time has been completed.
The vacuum system and seals have been inspected, if applicable.
The cooling-water system or strand-cooling system is ready.
Pelletizer blades and related components have been checked.
Downstream conveyors and pellet collection equipment are ready.
The raw material meets the required size, cleanliness, and moisture specifications.
The approved startup sequence is available to the operator.
The initial trial-run parameters and pellet quality will be recorded.
A completed checklist does not replace the manufacturer’s commissioning approval or the operator’s training. It is a practical tool for reducing the likelihood of overlooked issues before production begins.
How HuaZhao Machinery Supports Plastic Pelletizing Line Commissioning
Selecting the right plastic pelletizing equipment is only one part of a successful recycling project. Correct installation, commissioning, process setup, and operator training are also important for achieving stable output and consistent recycled pellet quality.
HuaZhao Machinery provides customized plastic recycling and pelletizing solutions for materials such as PE film, PP woven bags, and other compatible recycled plastics. Depending on the project requirements, a solution may include feeding equipment, extrusion and degassing systems, melt filtration, pelletizing equipment, cooling, and downstream handling.
When planning a new line, buyers should confirm the following with the equipment supplier:
Which raw materials and contamination levels the line is designed to process.
The expected output range for the specified material and pellet requirements.
The required electrical supply, cooling water, ventilation, and installation space.
The recommended startup sequence and operating parameter ranges.
The scope of installation guidance, operator training, spare parts, and after-sales support.
For a more accurate equipment recommendation, provide your raw material type, material condition, target capacity in kg/h, and required pellet specifications.
Contact HuaZhao Machinery to discuss your plastic recycling and pelletizing project. Sharing material photos or videos and your target production capacity will help the technical team assess your requirements and recommend a suitable configuration.
Final Recommendation
A successful first startup depends on systematic inspection, correct temperature settings, sufficient preheating, controlled feeding, and close monitoring of the machine’s operating condition. Do not rely on generic temperature, speed, or timing values when the machine manufacturer’s instructions specify different requirements.
For a new twin-screw plastic pelletizing machine, use the supplier’s commissioning checklist as the primary reference, record the initial operating parameters, and train operators to identify abnormal conditions before full production begins.